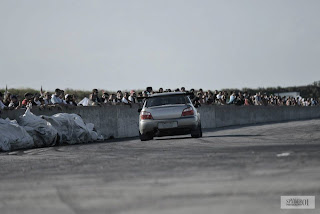
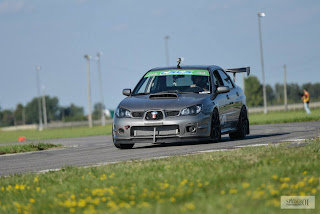
Track: Toronto Motorsports Park, Cayuga
Weather Conditions: 26°C Sunny
Photo credit: Charles Spivak
I had mixed feelings coming into Round 4 after the disappointing crash at Round 3. On the one hand, I really wanted to do well and put up a strong fight in Super Street AWD, but on the other I didn't want to break something again and put a further beating on my bank account.
One could call it 'Days of Thunder Syndrome', where you totally forget how to race and are afraid to take risks. This was not going to be me.
The key for today was to focus on getting my confidence back and working back up to the limit. So I wrote down some key words on my track sheet: "Patience" and "Warm-up". I even removed my lap timer from visual sight and stuffed it in the glove box.
Removing an endlink is the same as running no swaybar
The car was also in a dynamic state of change. Since I recently sold my JDM Spec-C seats, I had to borrow a loaner OMP bucket seat from Can-Jam. I was running with no front swaybar as a trial. And last but not least, a slightly bigger loaner turbo (GTX-3076) to make the car a bit more competitive.
Qualifying & Testing Changes
Photo credit: Charles Spivak
It was great to be back out on the track again in my own car. All of the anxiety and nerves I had coming into this event disappeared once I hit wide open throttle.
GTX-3076 vs. EFR-6758 Turbo:
There was quite a difference in turbo lag compared to my old Borg Warner turbo. But in a sense, that made the car a bit easier to drive. I felt I could modulate the throttle better on corner exit, rather than have all the torque snap the wheels free too quickly. It just suited my driving style much better.
No Front Swaybar:
The lack of front swaybar made the front end a bit more floaty but honestly I didn't notice too much of a difference in terms of overall grip or lap times. I ended up reconnecting it later on. With the swaybar connected the car was just a bit more predictable on turn-in.
OMP Bucket Seat:
The OMP bucket seat provided a bit more extra support, especially through the esses in T2 through T4. Although the JDM seats were a wicked daily driving weekend warrior seat, I don't regret my decision at all to upgrade to a full bucket. Street driving to and from the track was just as comfortable. But getting in and out of the car was a bit harder.
Two issues plagued me during qualifying:
The first was that my front splitter was generating so much downforce that it was literally ripping the front bumper skin off the car. This caused me to lose one of my fog light brake duct covers on the track :(
Support bracket
Bumper bolt and Gorilla tape
Can-Jam's depth of experience here never ceases to amaze me. Together we installed some bolts on the side of the bumper to hold it in place and also rigged up a support bracket to keep the front of the splitter from collapsing. And as an extra measure, some Gorilla tape. All done on our lunch break!
Photo credit: Charles Spivak
The second issue was a bit more severe, and it was actually causing me to lose seconds per lap. Coming onto straightaways after 3rd gear turns, I was having an intermittent issue with 4th gear breaking up. I would upshift and apply 100% throttle but the RPM's would not increase and it felt like I wasn't accelerating at all. After losing some RPM's the throttle would then kick back in and continue as normal. I'd estimate at least 1.5-2 seconds per lap being lost because of this issue.
Great view from Mike Gardner's 350Z. I have to let him pass on the 2nd lap due to my throttle issue.
Qualifying Lap Times Pt. 1:
Session 1 - 1:23.35
Session 2 - 1:25.90
I didn't know it, but my car was running on a low boost map. Can-Jam was secretly helping me regain my confidence as well. We thought the issue might be tune related so we switched over to the high boost map. Unfortunately this didn't resolve the issue.
Qualifying Lap Times Pt. 2:
Session 3 - 1:20.74
Session 4 - 1:20.31
Photo credit: Charles Spivak
I qualified in 3rd place, with Mike Harvey and Richard Grossi both ahead of me doing mid 1:19's in their STI's. Today was going to be tough. But this is where I had to remind myself that there was nothing I could do about anyone else's lap times. Anything could happen. They might make a mistake during time attack. If I stayed focused and brought my A-game, then that's all that mattered.
Pre-Time Attack
As a last ditch effort to resolve the throttle issue, I filled the car up to a full tank of gas. I had been running most of the day with under half a tank of gas and there was the possibility that fuel starvation was occuring due to the increased lateral G's from the aero/tire upgrades. Speaking with my fellow competitor Mike, he mentioned that when he was low on fuel, he would notice fuel cut about 1-2 seconds after coming out of a high G turn. That sounded like my problem! I never liked to fill up more than half a tank for weight reasons in the past, but if this fixed my issue, it would be well worth the trade off.
Time Attack
Stick to the game plan and warm-up the tires. Patience. That's what was going through my head as I waited for the marshal to release me on the track.
The warm-up lap is an excellent time to drive slowly and try to hit every braking point, turn-in point, and apex. HPDE 101.
First hot lap and the moment of truth. Coming out of the hairpin onto the main straight and shifting into 4th gear. Will there be power or will it hesitate? ... Nothing but pure POWER!!! After the second straight I knew I was golden. Hot lap 1 felt good. No major mistakes. Hot lap 2 also felt good. I over shot the apex of T9 a little, but it still felt fast overall. Knowing I had put down a decent first and second lap, I decided to just go for it in lap 3.
Time Attack Lap Times:
Hot Lap 1 - 1:19.71
Hot Lap 2 - 1:18.87
Hot Lap 3 - 1:18.45
Final result was 1st place in SSAWD and a new class record at TMP. Previous record was 1:18.85 set by Mike Harvey in Round 1 earlier this year.
Having my first win of the season felt amazing especially after all I've gone through this year. I could not thank Can-Jam Motorsports enough for all their hard work and track side support. And huge thanks to my one man pit crew of the day, Ryan, for helping out where he could.
Today was a proof of concept for me that at the core of any tough competition, a focus on the fundamentals will take you a long, long way.
Points Standings as of Round 4
Bdon - 330
Alex - 270
James - 260
For more information check out CSCS.ca
See you at the Season Finale on Sept. 22nd at Toronto Motorsports Park!


No comments:
Post a Comment